
Help Center
Getting Started
Welcome to Mass Image Compressor (MIC), your go-to tool for quickly compressing and managing large batches of images and videos with ease. This guide will walk you through the basic steps to get started, from importing your images to adjusting compression settings, so you can begin saving space without compromising quality.
Get instant help from Custom GPT for Mass image Compressor
Launching the App
When you launch MIC, you’ll see the instruction: “Drag & Drop Images, Videos or Folders”. You can drag and drop multiple images, videos or folders anywhere in the window to begin.
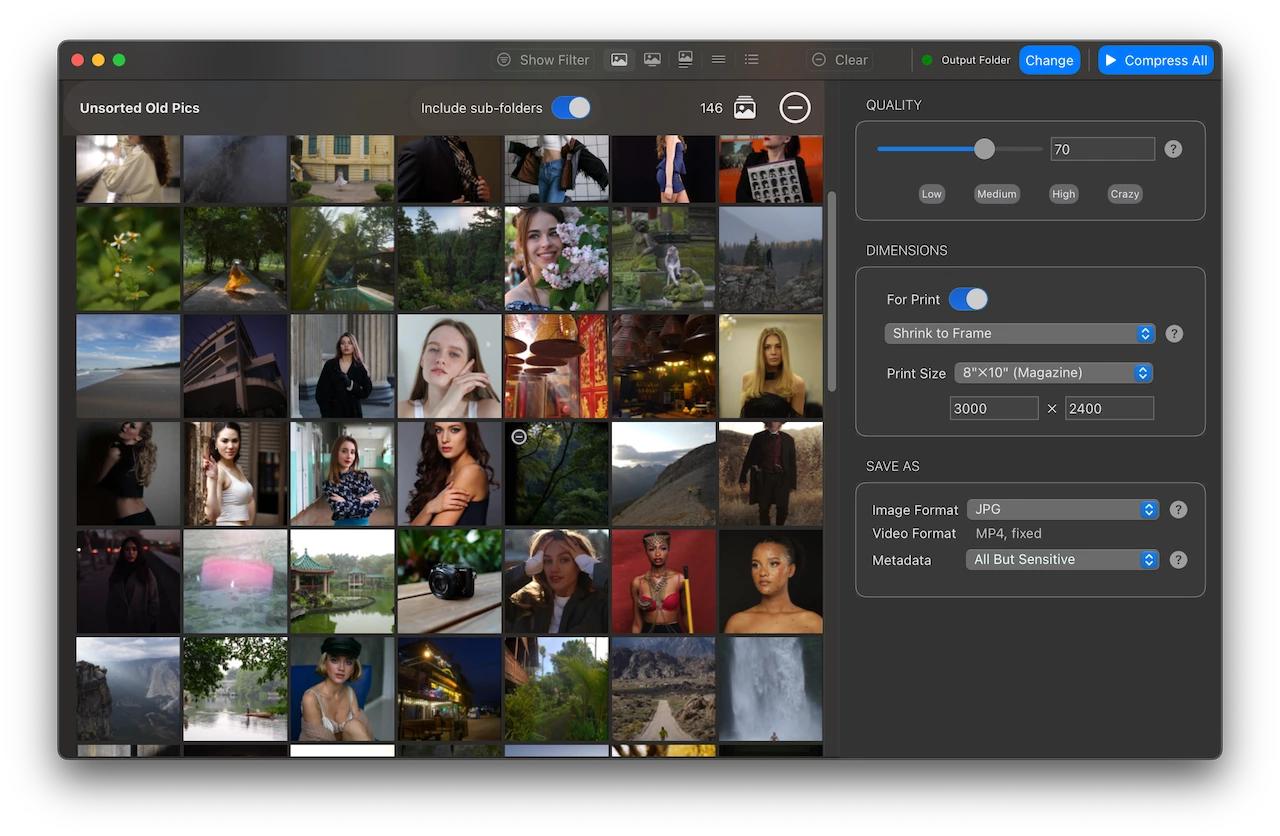
Gallery View
Once you’ve added your files or folders:
- The images will be displayed in the Gallery View.
- Expand any collapsed folder view by clicking the ⧁ arrow.
- To include sub-folders, turn on the “Include sub-folders” switch.
- This view lets you organize and browse through your selected files easily.
- Pro Subscribes can further apply filters to reduce the selection.
Preview View
Click on an image thumbnail from Gallery View to access the Preview View. This view lets you:
- Compare the original and compressed images or videos.
- Toggle between “Original” and “Compressed” using the toolbar at the top. Pro users can just hit the
spacebar to toggle between original and compressed image.

Compression Settings
- These settings are always visible in both Gallery and Preview Views.
- Compression settings apply to all images, not just the one selected.
- Adjust quality, dimensions, or output format to control the balance between image size and quality.
Selecting an Output Folder
Click “Select Output Folder” (top right corner) to choose where the compressed images will be saved. The folder structure will be maintained in the output.
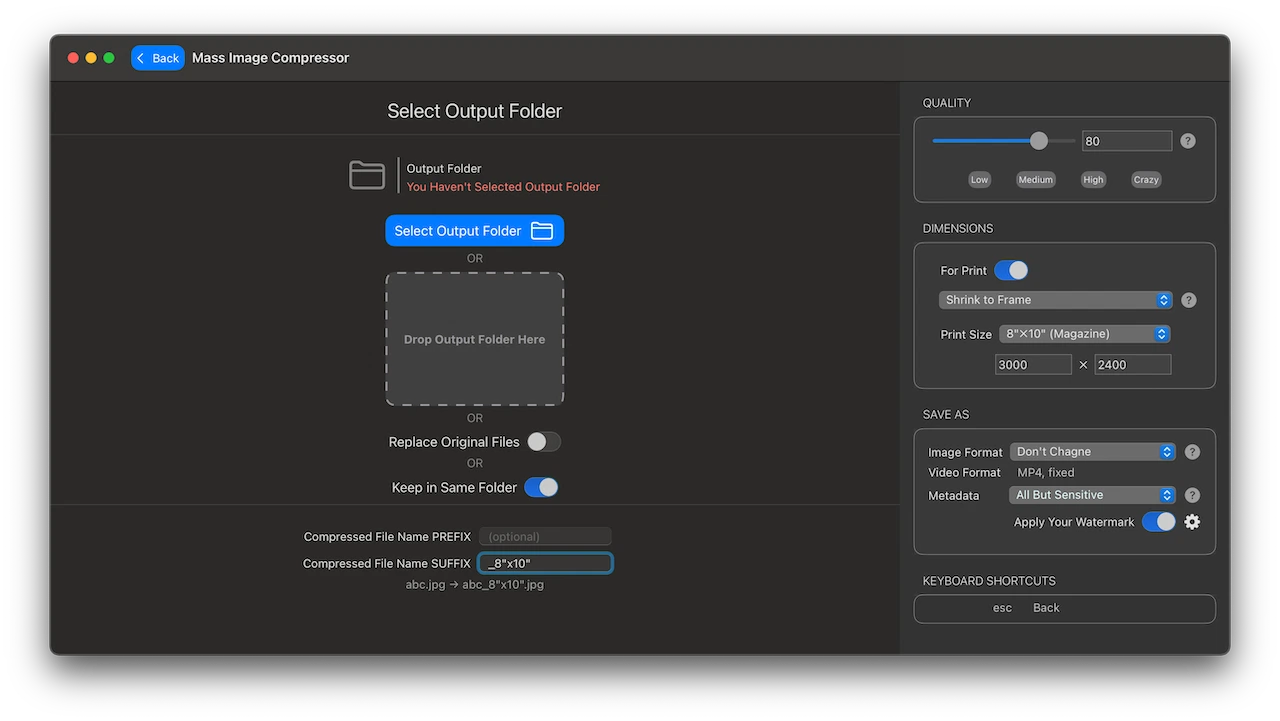
Warning: If you choose to replace the originals, ensure you have a backup. This operation is irreversible.
Compressing Images
In Gallery View, click the “Compress All” button (top right corner) to start the compression process. Ensure your compression settings are finalized before proceeding. Note: The “Compress All” button isn’t visible in the Preview View.
Compression Progress
While compressing, MIC shows the status for each image. You can stop the process anytime by clicking “Stop Compression.” Any errors encountered will be accessible via the “Show Errors” button.
Additional Features for Standard Subscribers
Purpose of Standard Subscription is aimed at occasional household or professional who use the software occasionally. We aim to provide the Standard Subscription at minimal cost for win-win condition for us and our user who do not need Pro features.
- Advanced Metadata Copy: Ability to skip sensitive metadata options from EXIF metadata, with options to skip sensitive data for more privacy.
Additional Features for Pro Subscribers
Pro Subscription provides value to professional who heavily use the image compression more often, like photographers and artists or occasional users whose time/peace is more valuable than subscription cost. Pro Subscribers get all feature that make it using MIC even quicker experience. My personal favourite is ‘space bar’ keyboard shortcuts in compression Preview view where I can easily switch between Compressed and Original images to verify my compression settings.
- Custom Watermarks: You can add your own watermark image (PNG or WebP watermark is recommended) and save it for future use.
- Keyboard Shortcuts: Access exclusive shortcuts to navigate images, zoom, and compare with ease, making your workflow faster. All these options are accessible via buttons for Free and Standard subscribers.
- Print Image Sizes: Directly select print size as dimension for 300 dpi print. Our Free and Standard Subscribers can manually provide pixels entry manually for their desired size.
- Filters: Include or exclude images based on image name patters (such as
*.cr2|*.cr3), last modified date and file sizes on disk. This is exclusive option for our Pro Subscribers.
Supported Input Formats
Supported Input Formats:
- Standard Image Formats: JPEG, JPG, JP2, PNG, BMP, HEIC, HEIF, WebP, PSD, TIFF, GIF, AVIF
- Video Formats: MP4 and MOV
- Camera Raw Formats: Popular raw formats from leading cameras, including:
- Apple, Ricoh, Pentax, DJI, Leica and many others: DNG (Digital Negative)
- Canon: CR2, CR3
- Nikon: NEF
- Olympus: ORF
- Sony: ARW
- Fujifilm: RAF
- Panasonic: RW2
- Supported Manufacturers: Canon, Nikon, Sony, Fujifilm, Olympus, Panasonic, Leica, Hasselblad, Pentax, Ricoh, Blackmagic Design, DJI, Apple, Samsung
Note: Certain raw formats from some manufacturers (e.g., X3F from Sigma) and others like Phase One, Kodak, Polaroid, Casio, Adox, Parrot, and YI Technology are currently not supported.
Supported Output Formats
Supported Output Image Formats: JPEG/JPG, TIFF, PNG, HEIC, WebP, GIF
Output Image Formats: All MOV and MP4 will be converted to MP4 only