
Help Center
Screenshot Compression
Screenshot Compression Strategy
When compressing screenshots with Mass Image Compressor (Download for Mac or Windows),
- Choose lossy PNG when screenshot has less colors, no gradients. Expect up to 60% file size reduction.
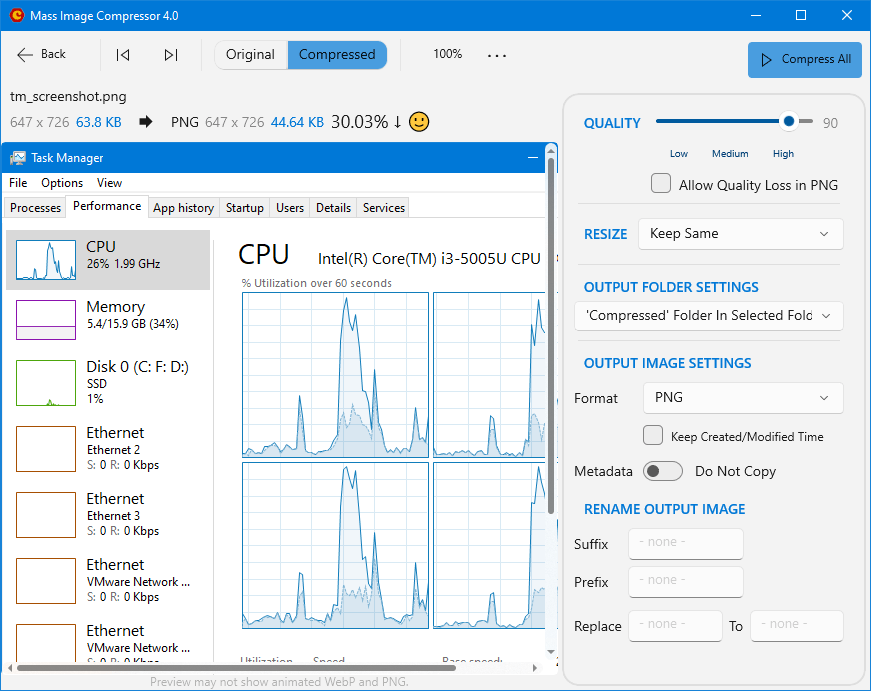
- Choose lossless PNG when you do not want any quality loss at the cost of file size. Expect 20 to 30% file size reduction.
- Choose WebP with 90% when your images have gradients and many colors but you do not want to lose quality at the cost of file size reduction. Expect 20% to 40% reduction but this varies a lot based on image.
- Choose WebP with 60% when your images have gradients and many colors but you are not bothered about pixel perfection. A scenario may be: you are sharing screenshot via email for utilitarian/troubleshooting purpose.
Read further to know more about Lossy and Lossless PNG compression with Mass Image Compressor.
Mass Image Compressor (MIC) provides robust PNG compression by leveraging two industry-standard libraries: Oxipngand pngquant.
Lossless PNG Compression (Oxipng)
By default, MIC uses Oxipng for PNG compression. Oxipng is a fast, lossless optimizer. So, no pixel data is lost, and the output image is visually identical to the original. For typical PNG files (images with many colors and gradients), Oxipng can reduce file size by up to 30% without any loss of quality or transparency. Actual results vary by image complexity and how optimized the PNG was before compression, but 20-30% is common for unoptimized images.
Lossy PNG Compression (pngquant)
For users who want even smaller file sizes, MIC also offers an “Aggressive PNG Compression” mode, powered by pngquant. Unlike Oxipng, pngquant applies lossy compression by reducing the number of unique colors in the image (color quantization). This can result in dramatic file size – reduction up to 70% smaller for images that use flat colors, such as logos or UI screenshots.
However, lossy compression comes with risk: using aggressive settings on full-color photographs or detailed images can cause visible color banding, posterization, or a “1990s web graphic” look. Earlier versions of MIC (up to v3.3) did not provide option to control the PNG quality, which could make batch-compressed PNGs look noticeably worse, especially if you missed checking the result.
Quality Management in v4+
Starting with MIC v4.0, we now have a checkbox below the quality bar specifically asking user if the PNG should follow lossy compression pipeline or not. If unchecked, all PNG are compressed without any quality loss. You can expect up to 30% compression for unoptimized images (which is most of PNG images on the web).
Even if you choose to compress PNG with lossy options, MIC never reduces quality below a safe threshold when using pngquant. This ensures that, even when lossy compression is selected, important visual details are preserved. You get optimal compression for flat/simple images and safe quality for complex ones, making MIC reliable for batch jobs and professional use.
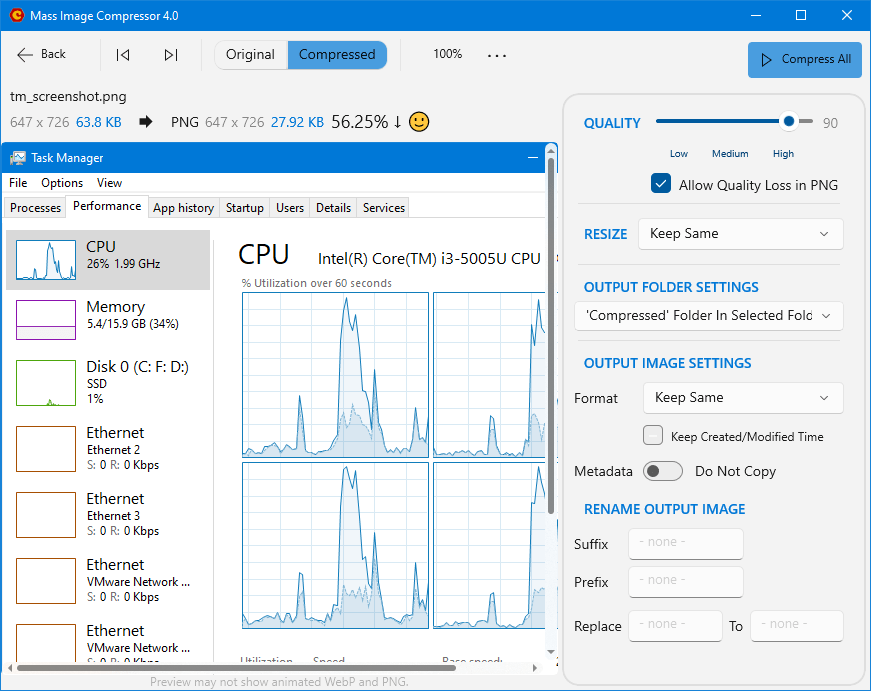
In above example, despite choosing Lossy compression method, we are not seeing any quality loss as the screenshot like task manager has fewer colors and almost no gradient.
NOTE for macOS users: We do not have “Allow Quality Loss in PNG” option in macOS version of Mass Image Compressor. This option is exclusive to our Windows version.
Screenshot Output Formats
PNG when: Keep the format to PNG if the screenshot has fewer colors. In our tests, we have seen PNG format gives most optimized filesize and highest quality when “Allow Quality Loss in PNG” option is checked.
WebP when: WebP shines when you have many colors in the image. A picture in the screenshot or gradient is handled best by WebP. We have seen 90% quality results in almost no quality loss (visually) but screenshots with 60% quality are still good for sharing via emails and provides best file size reduction (up to 50% reduction).
So, WebP is not king of everything after all. You have to take informed decision to get best out of Mass Image Compressor. But, even if you are not careful, as explained, Mass Image Compressor doesn’t it’s best not to mess anything up but give you the best what you can get with your selected settings!